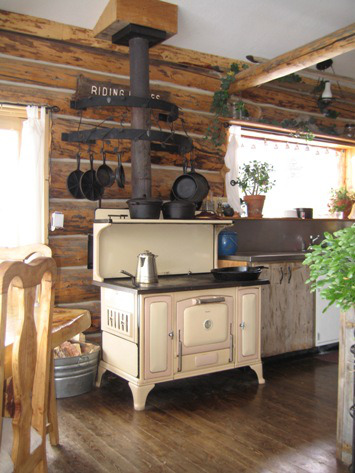
Here is part two in the series on cooking on a wood stove. I hope that you like it.
USING THE RANGE
The first question that enters the mind in regard to any range is “How
well does it bake?” The range does many equally important things all at
the same time. Broiling may be going on at the fire box end, boiling or
frying in the center, simmering along the outskirts, baking in the oven,
keeping dishes hot in the warming oven, heating adjoining rooms, and
supplying a tank full of hot water. Understanding all the functions of the range permits the thrifty
housewife to get the most out of it with the least effort.
COOKING ON TOP OF THE STOVE
Fill the teakettle before lighting the fire and get all the advantage
of the first flames. When a new fire is built, the strong direct draft
up the chimney tends to draw the hot flames close under the center of
the stove. Over a fresh wood fire the breakfast coffee sometimes boils
quicker in the center of the stove than on the less heated lids directly
over the firebox. Perhaps the dish of water for the four-minute egg
refuses to come to a boil. Why? -Because the cook has not learned that
water will boil quicker if a cover is put on the dish. A cover on the
spider has the same effect and also keeps the stove cleaner. A little
later, when the fire is well going, the whole top of the range is hot
enough for boiling in large kettles or heating the flats for ironing,
where electric ironing is not practicable.
 BROILING
Broiling should be prepared for in advance.
The fire should be built up high and show an even surface of clear
red-hot coals. Good broiling requires intense heat for a short time,
over coals that are past the flaming and gas producing stage.
Open the oven damper so the smoke will go
directly up the chimney; also give the fire some draft underneath. Take
off the two lids over the fire and sear over your sirloin, chop or fish
as quickly as possible, with frequent turning. This quick searing of the
surface tends to prevent the escape of the juices and rewards the cook
with a toothsome article of food impossible to produce in any other way.
(A little olive oil on the steak before or after broiling gives a
wonderful flavor.) A coal or charcoal fire is the selection of the
world's finest chefs for broiling. Anything broiled should be served as
soon as it comes off the fire. If that is impracticable, put it on a
platter and keep hot in the oven.
USING THE OVEN FOR BAKING AND COOKING
The real test of the range is in the
baking. Nothing but individual experience is a safe guide in the
handling any particular range, but the general principle is the same.
When the fire is first started, the flames
rush over the top of the oven and thence directly to the chimney. This
heats the top of the oven, while the bottom remains comparatively cool.
The entire oven must be heated and the body
of fire must be sufficient to maintain an even heat for a considerable
length of time. The oven becomes evenly heated by closing the oven
damper, forcing the flames and smoke down one side and under the oven,
entirely around and up again to reach the chimney. Foods prepared for
baking or roasting differs widely in the time and temperature required
for cooking. A little practice will determine the correct temperature
and best location in the oven for different bakes.
In a coal range, baking is done directly on
the bottom of the oven or on the raised rack. Never attempt to bake
with the rack placed on the bottom of the oven.
HOW TO COOK ON YOUR RANGE
A little foresight and planning ahead will
save you many dollars in fuel and permit you to get greater service out
of your range. So long as there is a fire going it should be cooking
something or keeping cooked food warm. The old-fashioned stockpot is an
example. It remained on top of the stove all the time, taking anything
that would contribute to wholesome soups and stews. The stockpot could
be used to advantage, where canned soups are not easily obtained. The
breakfast cereal, cooked the night before, will be improved if kept warm
on the back of the stove.
Coffee, tea, soups and stews-anything that
should be served hot-will keep hot much longer after serving if the oven
has been used for a few moments to heat the dishes.
USE OF THE WARMING OVEN
Plates may be kept warm in the warming
oven, but this is not all that may be done in it. Dried fruit, such as
prunes, figs, and raisins, may be put to soak in water in the warming
oven, left there for hours and hours, developing a richness and
sweetness that cannot be otherwise produced.
One of the attributes of a good cook is a
knack of serving hot dishes hot. This is not always easy when· there is
considerable variety in the "menu." Here is where the warming oven may
play an important part and cause the guests to wonder, "How she does
it."
For example, a thick sirloin. If properly
timed, it may be broiled just short of completion. Then while the
accompanying dishes are made ready to serve, put the steak on a platter
with plenty of butter in the warming oven. The heat contained in the
meat with the heat contributed by the warming oven completes the cooking
and your steak is done to a turn, juicy and delicious, on a platter
that will keep it hot. This is one 6f the secrets of the expert broiler
of steaks.
Puddings, such as creamy rice
pudding, Indian pudding, apple tapioca, steamed fruit pudding and
others,
may be much improved by placing in the warming oven for an hour
after baking or steaming.
Stale bread may be dried out
in the warming oven for rolling and sifting, and pulled bread and
croutons for soups may be put into the warming oven and they will cook
of their own accord, without looking after them.
Jelly that has not jelled will
sometimes jell after a day or a half-day in the warming oven, and even
fruit that is half-ripe will ripen after a time in this convenient
place, with a dish of water set beside the fruit to keep it from drying
out.
USE OF THE BAKING OVEN
We all know the New England Boiled Dinner.
Not everyone knows the “Atlantic” Baked Dinner. About an hour and a half
before dinner time, put into "the oven, heated as for bread baking, a
four to five pound chicken, or a cut from the leg of veal or lamb, and a
dish of scalloped potatoes. Keep the temperature even.
Three quarters
of an hour later add three large carrots, scraped, and cut in halves
lengthwise, placing them on the rack of the pan that holds the meat. In
another fifteen minutes put in six tomatoes, in an earthen baking dish.
By the time the tomatoes are done-fifteen or twenty minutes-a baked
dinner for six persons will be ready to serve. After removing the meat
and vegetables from the oven, if you place in it six fruit patties, or
six cup custards in a pan with an inch or more of water, these will be
ready to serve for dessert.
BAKING WITH GRADUALLY INCREASING HEAT
Popovers, cream puffs, and éclairs, angel
cake and sponge cakes are easier to bake successfully if put into a
quite cool oven and the temperature gradually increased.
BAKING WITH GRADUALLY DECREASING HEAT
Four mixtures that are of a special shape
which should be preserved, like the fancy braided loaves, and Parker
House rolls, ought to go into a very hot oven, so that a crust will
immediately form, to preserve the shape, and then the baking may proceed
at quite a low temperature.
All meats, fish, and poultry are also
better cooked at a high temperature to begin with to hold in the
juices-then a gradual reduction of heat. Baste frequently.
BAKING WITH UNIFORM TEMPERATURE
Bread, cakes, pies, and vegetable may be baked at uniform temperature, or with a slight gradual increase or decrease.
All good cooks know the most important secret of all: WHILE THE BAKE IS ON, MAKE A JOB OF IT
No two conditions of range and draft are
exactly alike-in fact they will differ in your own home, depending on
the weather or the direction of the wind. There is a wide difference in
the quality of coal. Some coal ignites easily and bums out quickly
-other kinds hold the heat much longer. A set of exact rules for one
situation would not fit another. In any case there must be a good body
of fire to hold the oven at a cooking temperature. The articles that
are being baked or roasted may do better on the rack than on the bottom
of the oven, or vice versa. No definite rules made for one situation
would be at all valuable as compared with the stored-up knowledge gained
from EXPERIENCE-remembering how the oven acted before under similar
conditions and making it serve you better and better with every day's
acquaintance.
OTHER HIGH OR LOW STARTING TEMPERATURES
In many cases, cooking started at a low
temperature, gradually increasing, will develop a quite different taste
from the same food started at high heat. Boiled custards, if made with
cold milk, are more delicate than if the milk is added very hot.
Scrambled eggs or omelets cooked on a
fiercely hot pan from the start take on a richer flavor than when
started on a rather cool pan. It is necessary to work fast, however, as
overcooking on a very hot pan produces a result that resembles rubber in
texture.
Those who enjoy a really good cup of coffee
will agree that there is a surprising difference in taste. A cup of
real coffee has much more in it than hot water and dark brown color. It
should be good if you start with a good blend (ground at home just
before using) and are not too economical of the quantity used. For some
reason, coffee made in one-cup portions lacks the character of the
larger brew. Adding the shells of fresh eggs or a raw egg beaten up with
the coffee before boiling, both enriches the flavor and produces a much
clearer beverage.
Coffee tastes quite differently when
started with cold or hot water. It is the general opinion that a better
result is obtained by mixing with a little cold water and bringing to a
boil-then add boiling water and set back a few minutes to settle.
Cereals take on a different flavor,
depending on whether they are started in cold or hot water. Which is the
better flavor is a matter of taste.
WHAT HAPPENS IN COOKING PHYSICAL CHANGES
Wonderful things happen in cooking, and we
do not yet know all of them, or the reasons for them-though the reasons
for physical changes are better understood than those for chemical
changes. Nearly every thing loses weight in cooking. Meat, even when it
is boiled in water, loses weight from its shrinkage through heat, which
squeezes out much of its water content. Melting of the fat, too, results
in loss of weight. More weight in proportion is lost in cooking a small
piece of meat than in cooking a large piece, but an allowance of 25%
loss in weight is a fair average.
Bread and cakes swell, but though they
increase in volume, they lose in weight through evaporation of water. It
requires two extra ounces of dough to produce a one-pound loaf of
bread. Cereals, also macaroni and other Italian pastes, increase greatly
in both weight and volume, through absorption of water. So do dried
vegetables and fruits. Though other physical changes occur, those in
weight and volume are the most important in cooking.
CHEMICAL CHANGES
The change in color of red meat to gray is
one of the physical changes that indicate a chemical change. Heat causes
a breaking up of the chemical substance to which meat owes its red
tint. The brown crust on the loaf, or on the outside of the cake or pie,
means that starch has been changed to dextrin, and sugar caramelized.
In boiling fruit and sugar together, as in
making cranberry or apple sauce, a chemical change is brought about in
the sugar, which is transformed into another kind of sugar not so sweet
as the granulated cane that was originally used. This new sugar is only
three-fifths as sweet. Here then is a hint for economy of sugar, by
cooking the fruit sauce without sugar, and adding sugar when the fruit
is done. In this last way, theoretically, three pounds of sugar will
sweeten as much as five pounds that were cooked in with the
fruit-provided it was cooked long enough to change it completely into
the form of glucose that is only three-fifths as sweet as cane. In any
case there will be considerable saving of sugar when it is added last.
Many other important and interesting
chemical changes occur in cooking, but a review of them here would not
add a great deal of practical value in everyday use of the range.
The foregoing hints are confined largely to
the mechanical operation and care of the range. So much depends on the
preparation of foods for cooking that the temptation to add several
pages of palatable recipes is very strong.
If the range "works well" all the time, both the stove and the
draft are all right. If the range has "off days," the chimney draft
needs attention. A cleaning out may help or perhaps an extension of the
chimney to a point where the air currents will improve the draft.
If you are getting good results only part
of the time, you should get much better results the rest of the time, by
making a study of the conditions of fire and draft, when the stove is
at its best. If the range fails to give satisfaction the greater part of
the time, look for serious defects in the range itself or in the
conditions of its installation or operation. No range could do
satisfactory work any of the time if it had serious defects. If it is
racked or broken or worn out, it is past its usefulness. Its operation
becomes rapidly more wasteful and irritating and the early installation
of a new range will be good economy and good sense.


